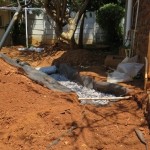
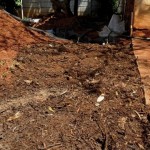
Finally got around to installing the French drains this weekend. Part of the procrastination on my behalf was due to the fact that I knew it was going to be hard physical labour, and it was. The heat levels we are currently experiencing in Snor City did not help either. But sunscreened and behatted Last and I started digging on Saturday morning. Due to a severe – and rather timely :p – case of the man-flu, manlief was the official photographer for this project.
I drew up a not-to-scale plan of my idea and after conferring with a couple of different sources, I decided that the idea was solid enough. However instead of doing everything at once, we’ll tackle each section on its own. Starting with the main drain, marked in red below, and seeing how it performs with the next rainfall before digging up more drains.

The plan for the eventual drainage network. This weekend we only dug the main artery, marked in red.
We invested in a garden hoe and a pick axe, but if the area you would like to drain can be accessed by a back-hoe then by all means rather do that! Digging is HARD WORK!
Traditionally French drains are used to drain areas where water dams up. By grading your trench as little as 1 cm for every 100 cm you will be able to let the water drain off to a more suitable area of your choosing. However because our problem is a little different, we modified the idea a little bit, making the trenches really deep at the top and shallower towards the bottom. The theory is that most of the water will then sink into the deep trenches and follow the drain to the bottom, thus slowing down the flow of the surface water and actually allowing water to seep into the soil. Fingers crossed that this is what will happen…
So onto the nitty gritty of French drain installation.
- Mark out out your trench system using string and dowels. Start digging like a madman.
- Line the bottom of the trench with landscape fabric and layer the gravel on top of it. The landscape fabric keeps debris and mud from clogging up the gravel drain.
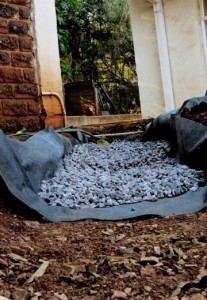
- Cover the layer of gravel with more landscape fabric and get a dog to inspect your handiwork.
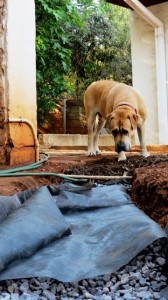
- Fill the up the trench with soil. The soil we dug up was dead, not a sign of life in it. No wonder nothing I planted grew, so I decided to fill up the trenches with the ten million kilos of compost we have been collecting the past two years. Hopefully this will also aid water absorption and actually let some nutrients trickle back into the lifeless soil.
I unfortunately ran out of gravel before I could complete the whole drain, but as soon as the gravel stores have been topped up I will finish it. After that I will start doing rain dances and google all sorts of other mystical stuff to make it rain so that we can see if the idea works.
I will post an update tomorrow with a picture of the completed drain, until then start wishing rain this way.


