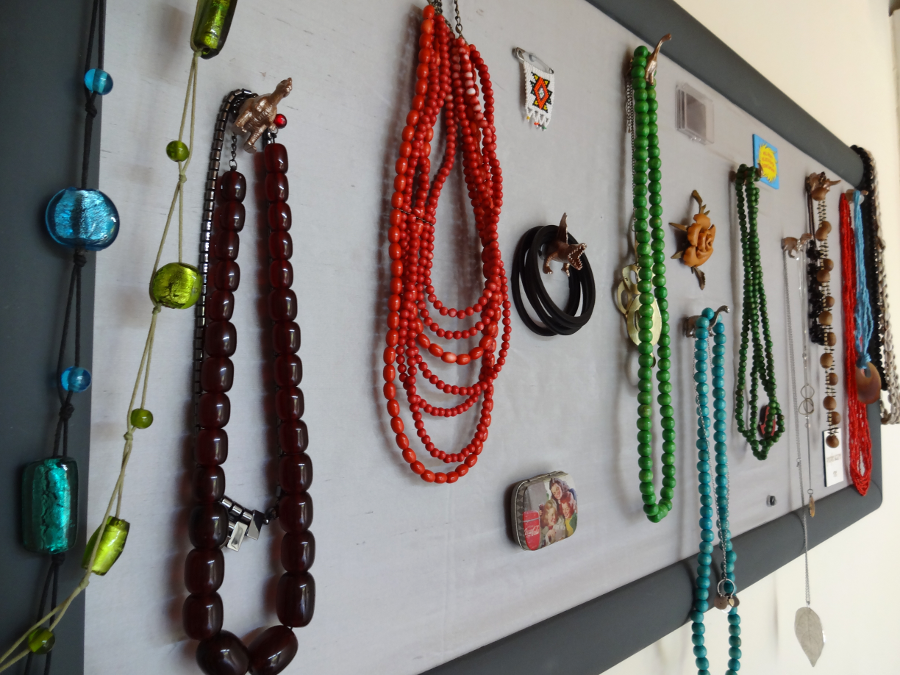
I think the collective noun for necklaces should be a mess of necklaces. No matter how carefully you put them away somehow when you open your drawer again all of them have tangled into a glorious mess. So I have been toying with the idea of a jewellery display for ages, but I do not like the chicken wire or peg board solutions that are all over the web. I wanted something like it, but not it.
This project began when I found a large empty picture frame on one of my scavenging missions at The Revival Emporium. The frame was very sturdy, still had its backing board and some mounting board to boot. A steal at R120. If you are ever in the Pretoria area do visit The Revival Emporium, they have some great little treasures and the peeps are awesome too.
After I saw these cat butt memo magnets a couple of weeks later, I knew I found my solution. A magnetic display board with plastic animal figures to create the magnets from which the necklaces would hang. What I really loved about the idea is that if it turned out to be a crappy jewellery organiser I would still end up with a very nifty magnetic memo board. Either way I was going to win.
What you will need – the essentials:
- Second hand picture frame (or new if you want to)
- Sheet metal
- Strong magnets (really strong ones if you are going to use it as a jewellery organiser)
- Plastic animals
- Spray paint
- Super glue
The rest:
- Paint remover
- Methylated spirits
- Orbital sander
- Tin snips
- Handheld drill
The amount of preparation needed for this project depends on the state of your frame. Mine was in a very good condition, but I hated the cracked gold paint effect. That had to go.
Preparing the frame
Making the magnetic board
Once your frame is properly cleaned and fixed you can start assembling your magnetic board. I bought some sheet metal from Builder’s Warehouse. My frame was too big for their smaller sheets so I ended up having to buy the bigger sheet. Family, friends – you’ll be getting magnetic boards for birthdays and Christmas this year… I had some help to cut the sheet to size using tin snips.
BE CAREFUL. WEAR GLOVES. DON’T BE A DUMB ASS.
I used some left over paint from a previous project to paint the frame. If your frame is made of wood you might want to use a wood primer before painting the frame. Once you have taped over all the edges of the sheet metal cover it with the material of your choice. If you are certain of your fabric choice you can use glue to fix it to the metal sheet. I might want to change out the material at a later stage so I opted to fix it with tape. The material is not as stretched and smooth as it can be, but it is a small price to pay for adaptability.
Making your magnets
Now for the really fun part. Making your animal magnets. Initially I wanted to make wild animal magnets but I could not find an affordable set of those anywhere. When did toys becomes SO expensive? I ended up with a set of dinosaurs from The Crazy Store, cheap and cheery.
Once the paint has dried properly, use super glue to secure the magnet in the drilled hole at the back. Ja dis reg, plak dit in sy poeper… :p
A word on the magnets. Not all magnets are created equal, who knew. The most common type is ferrite or ceramic magnets. They are usually black and can be found on the back of most of your fridge magnets. They are however, not going to cut the mustard when it comes to keeping your necklaces organised. You are going to need neodymium magnets for that purpose. They are usually silver and the only non-industrial application that I know of, is keeping tank bags on motorcycles. They are a little harder to track down, but very definitely worth the effort. I eventually found some at Jix Hobbies but they can be bought online as well.
And that is it. Two weekends’ worth of playing and you will have an super versatile magnetic display board to use in your house or office. I have been using mine for three months now and it is very definitely one of the more useful craft projects I have tackled.
Have fun making and creating.


