So it turns out that the post I had planned for yesterday’s maak’it Monday might be illegal; not going-to-jail-illegal but very definitely ‘not regulation’. According to the South African Occupational Health and Safety Act, 1993 in the Electrical Installation Regulations section:
6. Electrical contractor
- No person may do electrical installation work unless that person has been registered as an electrical contractor in terms of these Regulations.
5. Design and construction
- A registered person shall exercise general control over all electrical installation work being carried out, and no person may allow such work without such control.
Thus in effect there is no such thing as DIY electricity fixes. And because I really like you reading this site, I will refrain from showing you things which might cause you harm. Thus just the highlights of this Saturday’s DIY fun. To make up for the lack of how-to in this post I am tagging a ‘How to wire your own plugs‘ tutorial at the end. That is luckily not outside the parameters of the Health and Safety Act, although if you are colourblind, I do suggest getting in a second set of eyes;).
So with all that said and done, this week’s almost maak’it Monday. The outbuildings on our stand houses a washroom, a garden shed and staff quarters. Unfortunately outside lighting was never added to the building, so getting in and out of there at night can be a hazardous experience. (Those ten o’clock at night realisations that you have nothing clean to wear tomorrow are a bitch!!) So it was decided to shed some light on the situation and install a motion sensor light. Easy enough, drill a hole through the wall and splice into the existing switch to add a new switch for the new light. Well, that was the theory in any case, turns out that there was more to it than that.
 The classic fixer-upper problem reared its ugly head as soon as we removed the switch to the current light. The muck of many years has collected in all the nooks and crannies, disgusting. The dirt was the least of our problems though, once we removed the old switch and added the new one, we realised that we are missing a neutral wire. We figured considering that there isn’t one we’ll just blank it off with insulation tape and try out the switch. (Can you say rubber gloves?) This testing process involved adding a power outlet to the end of our new cord and plugging in a bedside lamp. No joy. We need to figure out what to do with that neutral wire… Luckily the sweetheart belongs to an extremely knowledgeable and helpful forum whose members sorted us out in no time. Only later were we told that what we were attempting to do was in actual fact not strictly legal. But regardless, we had the solution to our problem and continued with the installation. The solution involved hunting for a neutral wire behind the distribution box. I’ll let the picture below speak for itself…

Whoever did the wiring behind the distribution box certainly did not comply with the Health and Safety Act! Luckily I was assistant to the sweetheart for this project, because I would have been “hanne-innie-hare” at this point if I had to do it alone! He found the correct wire and fed it through to the switch ready for connection to the cord going to the new light. Did the bedside lamp test again and eureka! It worked. All that was left to do was drill through the wall and fix the light on the exterior.
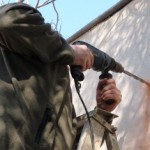
Just a couple of things regarding drilling through masonry, things I didn’t know and that I now know, so in future I might not get blank eyes when I speak to a building contractor…
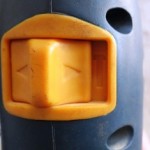
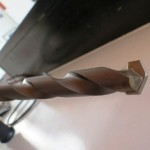
A drill has two actions – a drilling and a hammer action. The hammer action is necessary for drilling through walls and bricks and needs a special masonry drill bit. The hammering action breaks the masonry at the drill tip and the rotating flutes carry away the dust.
Once all the drilling was done, the light fixed to the wall and wired, it was time to flip the switch and see if we won this round.
Wire your own plugs
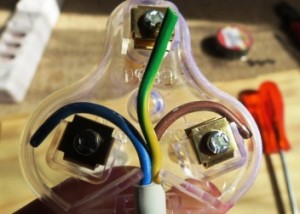
Just a quick note on electrical cords. In South Africa, as the EU and Australia, we follow the international standard IEC 60446 for flexible power cords. The standard specifies that all live or active wires have to be brown, neutral wires have to be blue and and earth or grounding wires have to be a combination of yellow and green. So what are all the different wires in the cord for?
- Brown (live) – connects your appliances to the main power supply in your house.
- Blue (neutral) – keeps the power loads in your house balanced (for a more detailed explanation read DES 56’s answer on electriciansforums.co.uk)
- Yellow/green (earth) – is a protective conductor which creates a low resistance path for faulty current to flow into. Like water, electricity seeks the path of least resistance. The current therefore starts flowing into the earth wire that is connected to a grounding rod, when an appliance shorts instead of flowing through the faulty appliance. Popping toast has nothing on a swift electrical kick in the cojones, when it comes to giving you a wake-up fright!
So a step by step on how to wire your own plugs.
- Unscrew or snap the cover off the plug. [Easy peasy way to remember how to loosen screws… Lefty loosey, righty tighty 😉] Most plugs clearly mark which wire have to go into which pin.
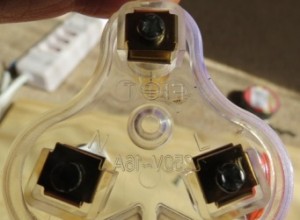
- Expose the three wires by removing the outer insulation. Use side cutters (diagonal pliers for the overseas folk) to remove about 5mm of insulation from each wire. Gently twist the exposed copper wire into a tight single strand.
- Remove the screw from each pin (I tend to loose screws so I do them one by one) and insert the twisted copper strand into the hole of the relevant pin.
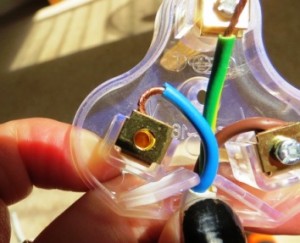
- Replace and tighten the screw to secure the wire in the pin. Take care that no exposed copper wire is anywhere but in the pin! Repeat for all three pins.

- Screw or snap the cover back on and your plug is as good as new and ready to use.

After the last three posts of hardcore DIY’ing I am very much looking forward to something a little bit more creative for next week. I very much want to sew those beautiful floor pillows for our new and improved TV room, but I figure I am going to need some more practice. My skills set is still VERY limited and the results are still VERY sloppy. However considering that this is a space where I – and hopefully you – learn and grow, am going try my hand at it anyway.
Until next time!

