As I mentioned in the last post, our mutts finished the job that the rain started on the door to their room and forced us to make serious work of getting a doggy door installed. Considering their rather considerable size and the fact that we did not want to replace the door (there is a bigger plan in the making for the room, so no need to spend money on something which will eventually be torn down…), DIY was the only way to go. We needed something along the lines of the strip curtains that they use for walk-in refrigerators, however after pricing ready made curtains it was very clear that we would have to put in the work and make the curtain ourselves. So the adventure began.
Like all modern day adventures this one took its first steps on the Internet, searching for rubber suppliers in the Pretoria area and after hitting a couple of duds, I finally found Pretoria Mat and Rubber. A quick phone call confirmed that they would indeed be able to help me and I am off to the Wille Weste. What an awesomely cool place their shop is! They have an incredible range of rubber products available, from clip on bakkie covers and mats (Ladies, if you are by any chance looking for a much appreciated gift for your offroader do give them a call!) to a rubberised material that you could use for making awnings, upholstering garden furniture or covering dog mattresses with. Certainly a name I will keep in mind when doing future projects.
So I ended up with a little more than a square meter of 3.5 mm thick, very pliable rubber for R228. Considering the quote we received for the ready made curtains was well over a grand, this is still a steal.
So the list of tools we used:
- Cordless drill
- Utility knife
- Measuring tape
- Chalk
- Chalk line reel (this project’s star gadget)
- Screws
- Grommet Pliers
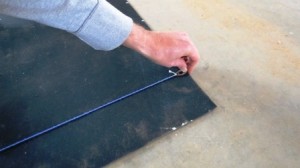
We, darling and I, calculated that we would need eight strips of 12 centimetres each to cover the door. We marked out the 12 cm sections on both sides of the rubber mat.
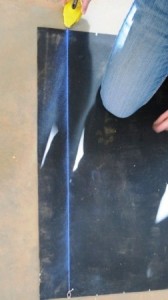
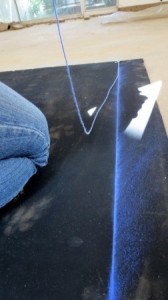
Next we marked the lines on the rubber mat using the chalk line reel. This nifty little tool allows you to mark out a straight line between two points and in our opinion is better than using a fancy schmancy laser marker. The string is reeled into a container filled with chalk, then reeled out – covered in chalk – and strung tightly between your two points. Give it a gentle tug and the string will deposit the chalk, marking the straight line. Easy peasy.
Mark all the lines out before you start cutting to avoid mistakes.
Use a straight edge to guide the utility knife along the marked line. Best to have your DIY buddy present at this stage, because fingers cut off with utility knives are no fun…
Once all the cutting is done, pull the rubber strips apart.
Darling and I once again did some calculations (this time not so cleverly) and decided that each rubber strip will get two holes 1.5 cm from the edges. Considering that each rubber strip overlaps the previous strip with 1.5 cm and overlaps the next strip with 1.5 cm it effectively leave 9 cm of the original 12 cm to cover the door with. The door is 78 cm wide and 8 times 9 equals 72. You see the problem right? Luckily we caught the error before all the holes were punched and could readjust the holes on the last couple of rubber strips.
Start fixing the rubber strips to the door using screws and a drill. Only fix the side against the door frame to the door.
Take the next rubber strip, align the grommet holes of the two strips and fix it with a screw.
Repeat the process with all the rubber strips.
Tada, one large breed doggy door up and running. That thin little strip at the end of the door is going to be a constant reminder of our silly mistake.
Some initial cookie bribing was needed to get the dogs comfortable with going through the strips, but they got the hang of it quick enough.
Happy hounds in a still very dirty room!
An insane amount of dust and dirt was trampled into the room during the doorless days. So I spent the whole of Saturday morning scrubbing the place from top to bottom. The thing about cleaning is that you very easily get sucked into a creeping commitment about it. First you are just going to sweep and maybe mop and then before you know it you are on your hands and knees scrubbing the floor with a brush. I gave myself a gym pass for my efforts though, could hardly dress this morning due to sore arm muscles…
Loxton gives lazy eyed approval for the doggy door.
Things I learned from this project:
- Double check ALL your calculations and measurements before cutting/punching/sewing/doing anything.
- Check those calculations and measurements again!
- Working with a partner is fun
Things Darling learned from this project:
- Plan, plan plan.
- Draw pictures
- The right tools make light work of any job, especially power tools 😉
And that is it folks. Until the next time. Happy playing!


1 comment for “DIY Doggy Door”