
It has been a while since my last post, but I am back and have found words again. Yay! \0/! I sometimes get that thing where I forget how to communicate in proper sentences. I want to do everything in bullet point lists and that doesn’t make for good reading… This project has been languishing in the draft section for over a month now and it is about high time I tell you about the wonders of organising your holiday packing in drawstring bags.
The pretend husband and I like to do our travelling on a bike. The advantages of this way of travelling are numerous. As pillion – that is what a motorcycle passenger is called – it is rather like being chauffeured. You get to sit back and relax and really take in the landscape without having to deal with the mechanics of travelling. No need for passenger seat braking, or sucking on teeth. And those ‘Please ask for directions’ fights? They don’t happen because you don’t even realise you are lost. It is rather a great way to see the world :).
 The only drawback of motorcycle travelling is that packing space is extremely limited. In a way it makes packing much easier, if whatever you pack is not going to keep you warm, dry and/or safe, it is probably not necessary to pack it. We had two panniers – they are the two ‘suitcases’ hanging from the side of the bike and one 50 litre ATG top bag to pack in. Go have a looksee at the ATG site, they have some seriously great products for the more adventurous spirits out there!
In any case, the pannier hanging over the exhaust is smaller (25 litres) and was used for easy access items; cameras, rain gear, repair kit etc. The bigger pannier (37 litres) and top bag was used for luggage. I have serious issues with dirty clothes mingling with clean clothes and don’t even get me started on having shoe smell on clothes. So I decided that I’ll make drawstring bags for keeping things separated and organised and it worked like a charm. I will very definitely use it in the future for all travel packing. I made each of us two bags and then a fifth bag for dirty clothes. I used one of my bags for bulk packing, items I’ll only unpack once we stay in one place for longer than a night and the other bag for easy access items, one change of clothes, pajamas, toiletries etc. The awesome thing about using this system is that as your washing bag grows, your luggage bags shrink, so there is always enough space for everything.
But on to the making of the bags. I am a total amateur when it comes to sewing so I might have missed some tricks and things that should have been done, but the bags work perfectly fine, so I am thinking it is good enough :).
 I suck at cutting in a straight line, but the gist here is to fold over your material so that you have one closed side and three open sides.
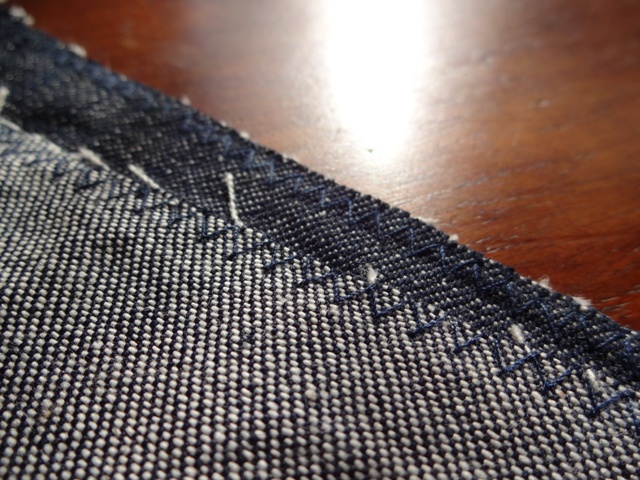 When everything is straight and in line use a zigzag stitch to edge all the sides. This will keep the material from unraveling.
 Once all the edges have been hemmed, line them up and use a straight line stitch just below the zigzag stitch to sew one of the open sides together.


This is what you will end up with after the above process.
Close the remaining open side with a straight line stitch. When I got to the edge of my fold-over I swung the bag 90 ° and made a few stitches on top of the existing edge and then reversed the sewing to end off. Pull the string through the ‘tube’. Use a bodkin to do this, it makes the job much easier. Et voilà, one drawstring bag done and dusted!
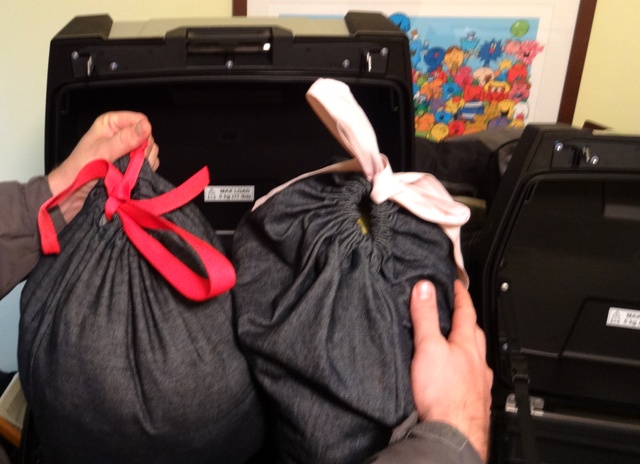
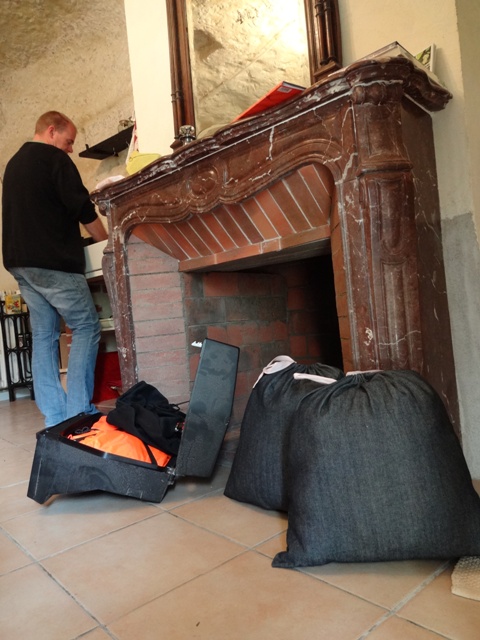
The drawstring bags in action